Build From Plans – Part 2
Building the Platen Arm and Platen:

Step 6: Before continuing with the press itself, we’re going to build the platen. The platen featured here is for adult T-shirts, so if you’re interested in printing other types of items you’ll need to build other platens of different sizes. This design is such that you can use the platen sideways for wide designs in addition to using it in its normal position. If that it not of interest to you, just don’t cut and attach parts W-b. (After a year and a half of having this press, I personally haven’t used it sideways, but have built larger, additional platens for wide designs.)
Using your drill press or workbench vise and drill, create half-inch holes in the middle of the largest side of 4 of your parts W. For the remaining 4, draw a line 2 3/8” in from the end and drill the holes in the new middle (see fig. h). Then attach them onto board G as shown in fig. i. Use a 2 x 4 to help you space the wood so the platen will fit snugly onto the platen arm when it’s ready. Also make sure that the distance between the holes in one direction is the exact same distance as the holes going the other way (see fig. j). You’ll definitely want to predrill your holes before attaching parts W or you’ll have problems with splitting wood.

Step 7: Now that you have a finished platen, let’s use it to determine where to drill holes in your platen arm (part U). Place the platen over the part U (it should fit snuggly). The curved edge of the platen should be 3” from the end of the platen arm. Mark the holes, remove the platen, then drill half-inch holes throught the platen arm, making sure that they go straight through. You may also want to drill a second set of holes 2 1/4” further in (to the left if looking at fig. k) for greater flexibility when printing.

Step 8: Now that the holes are drilled in the platen arm, let’s attach it to the table. Use your two carriage bolts with the appropriate washers and hex nuts to attach it and add four screws for added stability. See fig l for placement. The dotted lines indicate where to measure to insure your platen arm is straight (before securing). Attach part V as shown in fig. m so it’s centered in the middle of part U. Make sure the screws go into the table AND the platen arm.

Part 1: Build From Plans - Part 1
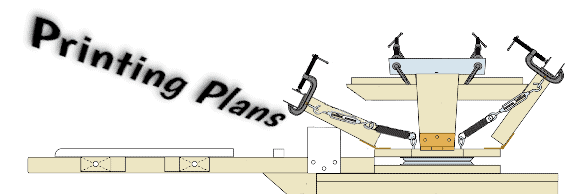
Part 2: Build From Plans - Part 2
Part 3: Build From Plans - Part 3
Part 4: Build From Plans - Part 4